Ballet Buns
- contributed by Mrs. Mary
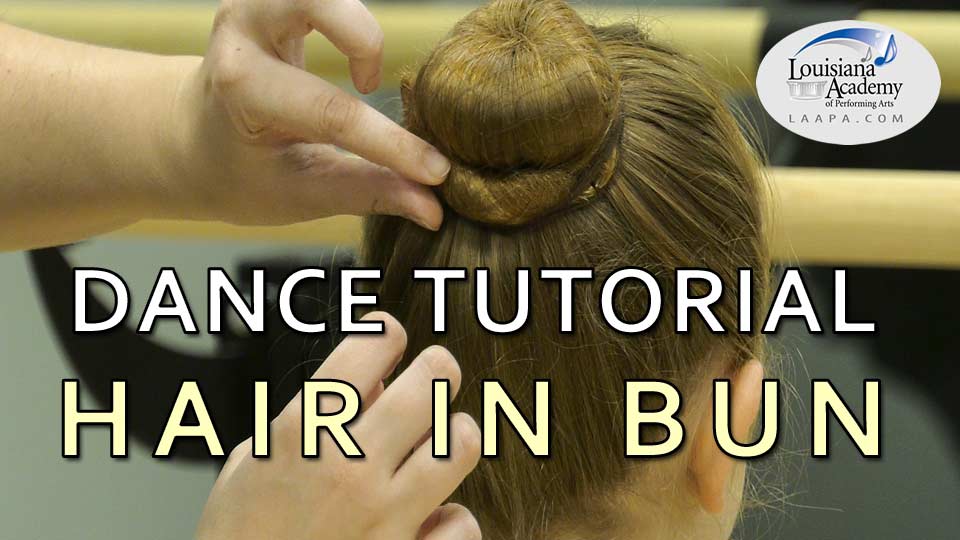
(00:07): Hello. My name is Miss Mary, I'm the chair of the dance department with the Louisiana Academy of Performing Arts. And I'm here with Miss Lucy, and we are going to do a bun tutorial for y'all today. So we're going to do two different types, the more professional stage appropriate bun, and then a quick and easy bun for those who are in a rush right before class.
(00:27): So Lucy, we're going to have you turn this way and we want to start with a nice solid ponytail. Make sure you have a thick hair tie that's not going to snap or become loose and make the ponytail sag throughout class. So here's the more traditional bun. We have our bobby pins right here, and then you can buy these packs of hair nets. They come in a set of three at any drug store. You don't have to go to a special hair store. I think they even have them at Winn-Dixie.
(00:59): So this is our hair net to just hold everything in place. And this is what the hair net looks like. So we're going to start with the bobby pins. And for my dancers, if you're having your mom or sister, aunt, dad do your bun at home, your job is to stay as still as possible. And then an extra helpful tip, you can be the one to hand me the bobby pins. So that way I can hold your bun with both hands, deal.
Miss Lucy (01:29): Mm-hmm(affirmative).
(01:30): Okay. So we start by twisting the hair so that we know little wispies fly. And as Lucy pointed out earlier, you can even braid the hair first and wrap it in the bun. And then you have some nice waves when you take your hair out of your bun. And we're going to start wrapping it around the ponytail. As we go, we want to place the pins in. Now a couple mistakes I see people do is they either open the bobby pin too wide and that makes it pop out, or they just stick it in the bud aimlessly. And they're not connecting the bun to the base of her hair. So you want to make sure you're connecting them together and don't open the pin too wide. Thank you.
(02:13): Now for performance, you want to make sure that your bobby pins match your hair. So Lucy, like a good ballet student, brought her own bobby pins from home for this tutorial. And they're a nice bronze color to match her gorgeous red hair.
(02:29): And we place it in and you want to make sure to do this as you're going, instead of twisting all the way around and then pinning it out because that makes the bun pop out and become a door knob bun, as I like to say. So you want it to be as flat to the head as possible and we're going to keep going and you're standing very still, thank you so much. Pinning as we go around. Almost done, two more. And last one.
(03:10): So now that we've gone all the way around, now I can just look at and do extra little touch ups. So another mistake I see with homemade buns is not enough bobby pins. This is not a case of less is more people. This is a case of more, is more. We want like 10, 20, as many Bobby pins as you need to set it in place.
(03:36): Now Lucy can do the shake test? Shake your head really hard, like you're doing triple pirouettes. How does it feel?
Miss Lucy (03:42): It's secure.
(03:43): Secure? Good. Okay. Then we put our hair net on and we wrap it around three times to make sure all of the little wispies stay in place. And then if there's any loose parts that you need to add more pins, then you go ahead and do that. You want to turn your head so they could see your beautiful bun? There we go. And then the front. Good. There's our final bun. Thank you so much, Miss Lucy. And now you're ready to pirouette across the stage.
(04:14): All right, now we're going to do our simpler bun that's great for classwork and all you need is a hair tie and a ribbon. Try to get one a little bit thicker than this one. This is the one I had available to me at home, but you also want to make sure it's not too silky of a material, that'll slip out of her ponytail. All right and if you're in a pinch, you can always use a shoelace. So we're going to turn you this way and we just take the ribbon and tie it around in a simple slipknot and slide it down the ponytail. Now, if they have layers in their hair, some of the layers might fall out of the first one, but that's okay. And we want to leave about two inches at the bottom. Then we roll it up and just repeat that process until the bun gets nice and tight.
(05:08): And it's okay if it looks a little messy at the beginning, because we're going to tuck it all under. And keep sliding it down and make sure when you're pulling it down to make it nice and tight, you have this hand on her pony tail. So that way it keeps it secure and you're not yanking on her head. Roll it up, I think we can get one more out of this to make it nice and tight. You're doing great by the way. And we'll tie it around. And we'll just make a little knot.
(06:04):And now she has a secure dance bun with a little red ribbon accent. How's it feel?
Miss Lucy (06:11):Good.
(06:12):Good? All right. You want to say goodbye to the camera?
Miss Lucy (06:16):Bye, thanks for watching.
(06:18):Bye. Thanks for watching. And now you have two different types of bun styles to do for class and performances. Enjoy.